My DHC-6 TwinOtter homecockpit
Apr 8, 2020 19:47:49 GMT
Post by PapaLima on Apr 8, 2020 19:47:49 GMT
Hi all,
My turn to present the project I started four years ago now... With a back footstep now, I would never imagined this adventure was so time and energy consumer.
I remember when I started during the easter holidays ... I said to myself it is a three months sprint 

Why the DHC-6 aircraft ? Just because it is a plane which can be used to go everywhere in the world. With wheels, skis, floats and even amphibian versions ... we see this aircraft in situation where it is the only one really able to go there : Antarctica, Lukla (highest airport in the Himalaya), Saba (shortest runway in the Carabeans), Tapini (a moutain valley in the New Guinea), the Maldives (where we can find the biggest DHC6 float planes base), the Marquises islands in French Polynesia... and a lot of other areas you probably know.
Thus, for me, it was an evidence that this plane is the most appropriate for a simer to play everyrwhere without being bored...
Like most homecockpit builder, I started by a lot of research on the web. I quickly realized that the DHC-6 TwinOtter does not exist... And that everything has to be built !!
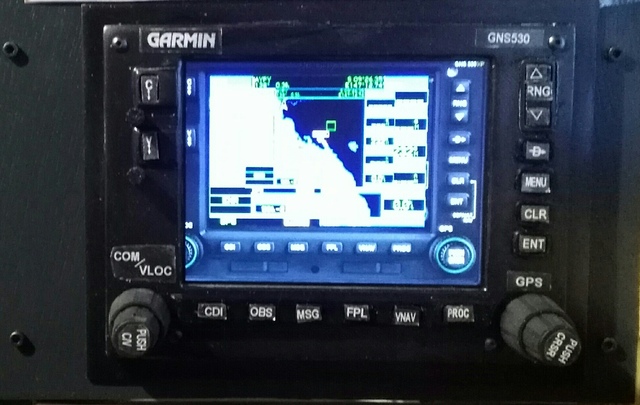
Apart the radiostack with the GPS GNS530 and the common radio elements which can be found, all the rest does not exist for simer...
After a couple of months of reflexion... i finished to stay on a balance between screens and buttons (to average the money spent too).
Rapidly, I selected :
- the P3D flight simulator I was already using
- The Aerosoft DHC-6 TwinOtter Extended because it seems the best for a lot of simers
- AirManager tool from SimInnovations to display the gauges on screens
- IOCards from a French electronic provider (OpenCockpits compatible)
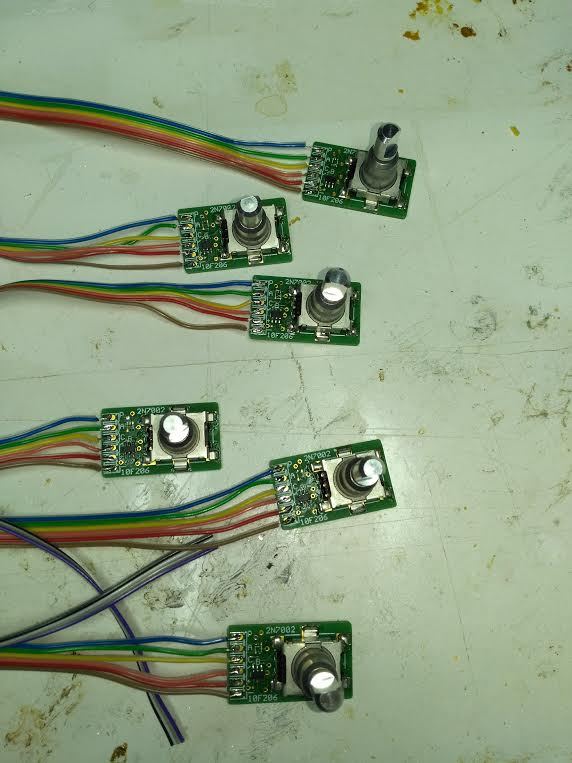
- Joystick cards from the same electrronic provider EFDE
- On demand built components from HomeCockpit.fr
- All the rest built from wood and plexy
Quickly I realized I will not have the space to build a complete cabin with both left and right seats...
So my homecockpit will be the left seat and the center console
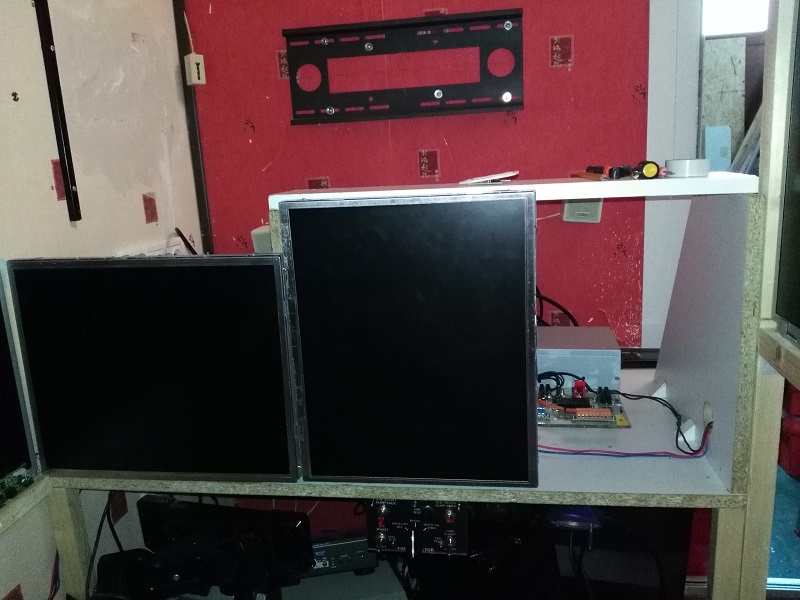
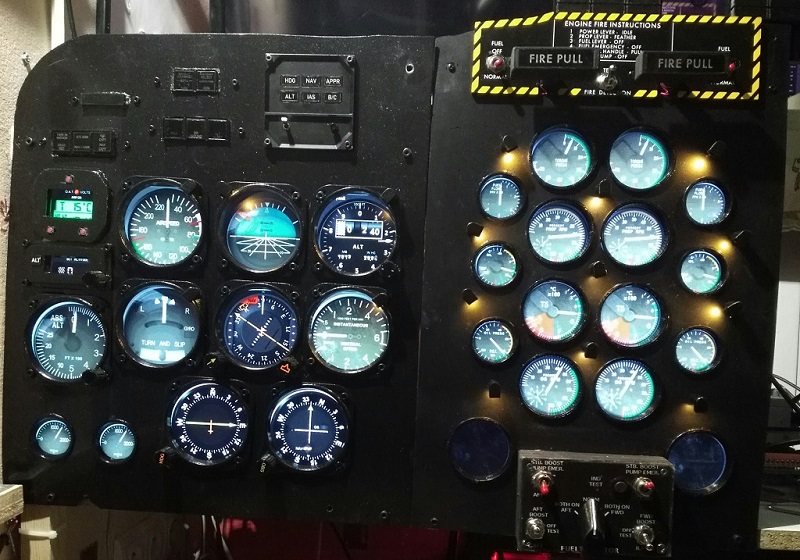
From the sizes I got from the web, i choosed to use 17" screen monitors in landscape for the captain instruments and another one in portrait for the engines gauges
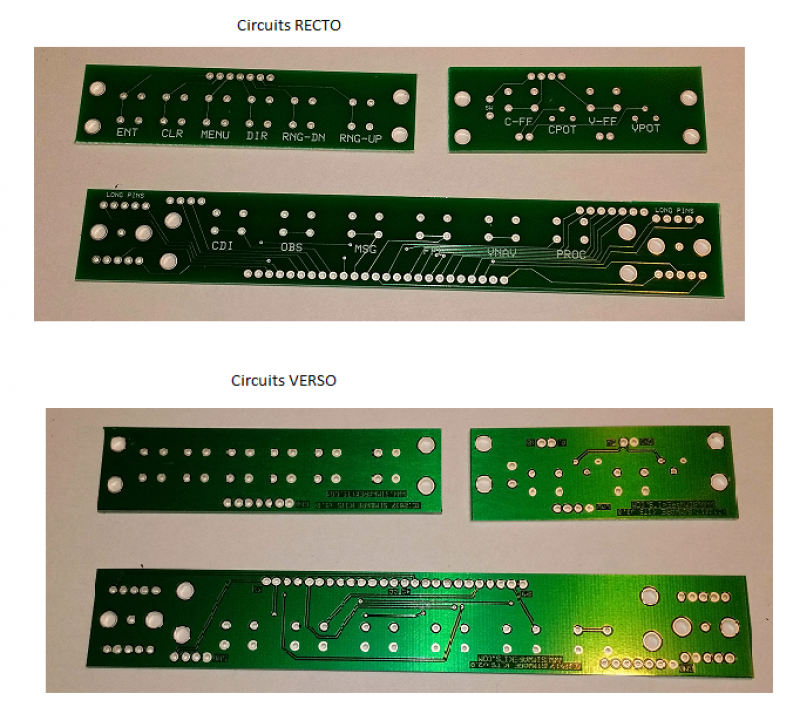
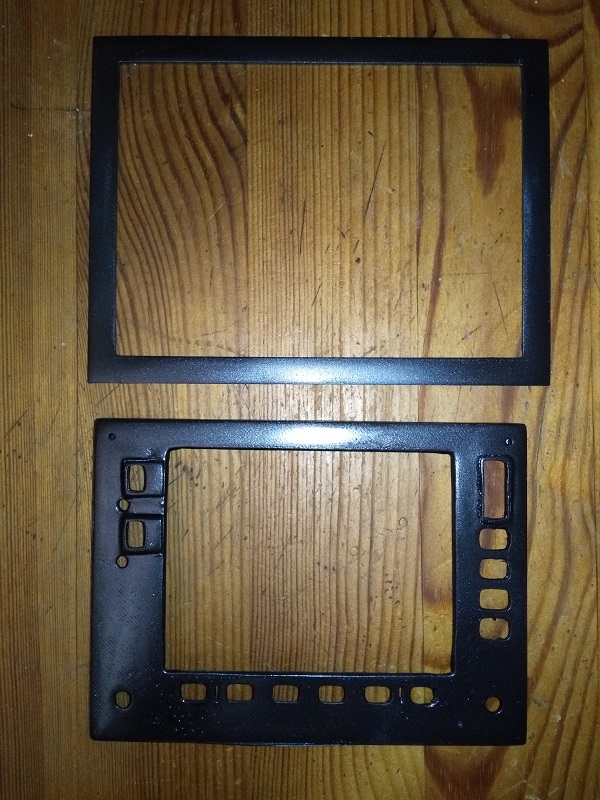
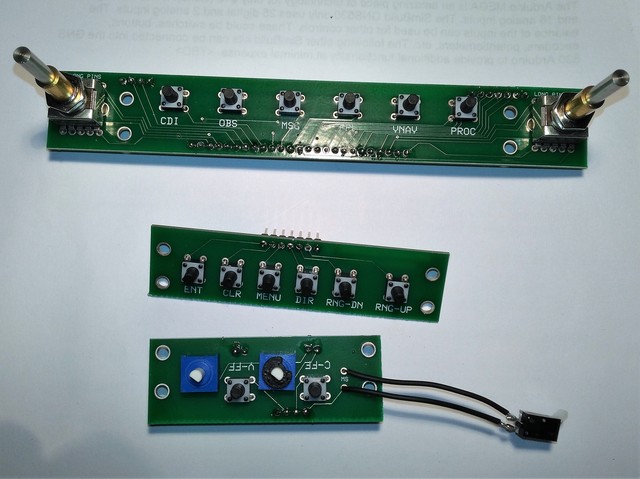
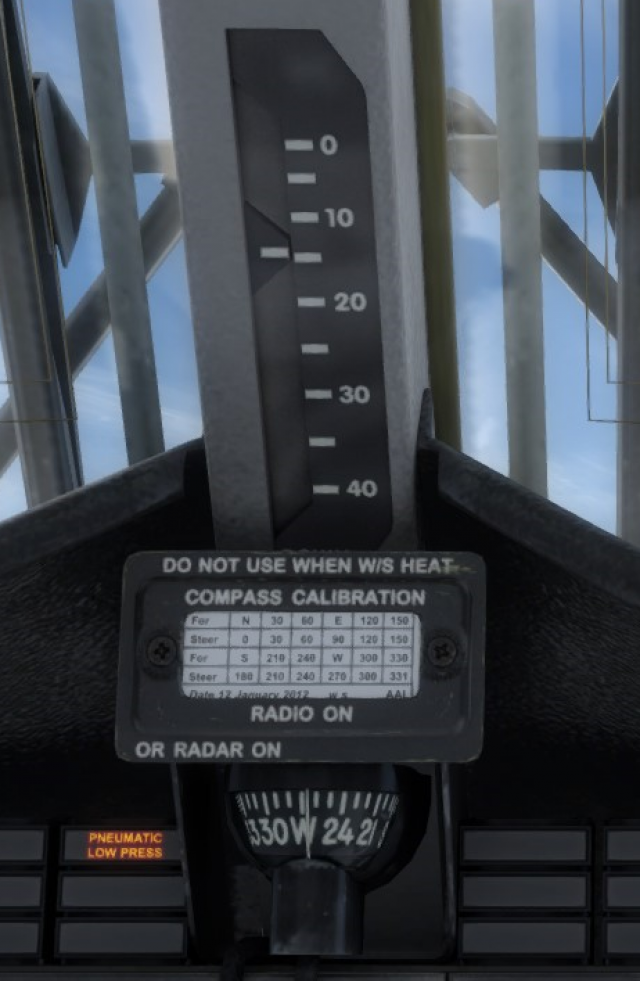
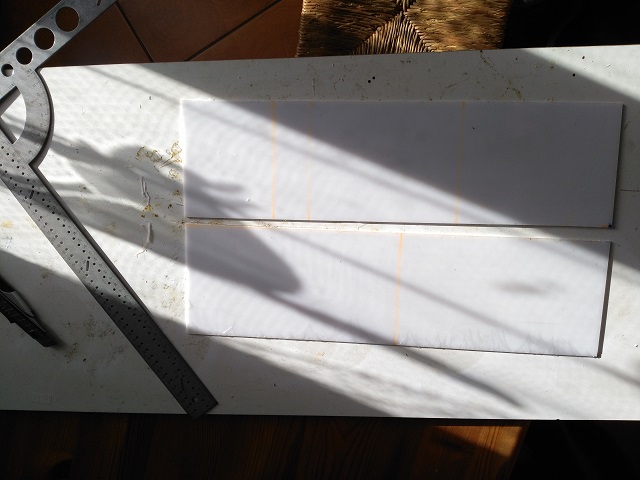
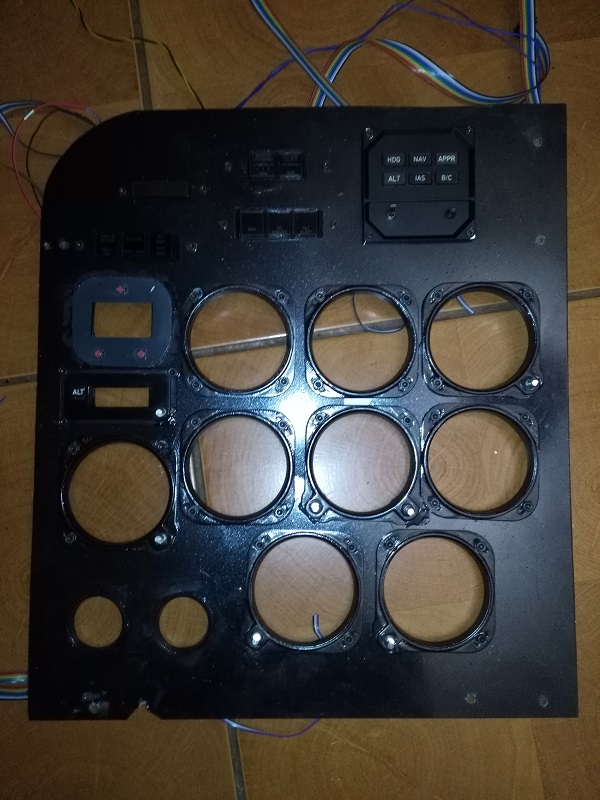
Then some plexy with holes to see the gauges. This facade is the captain instrument one.
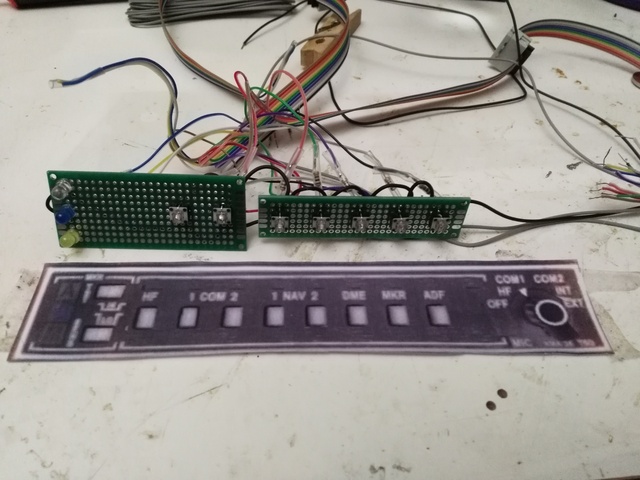
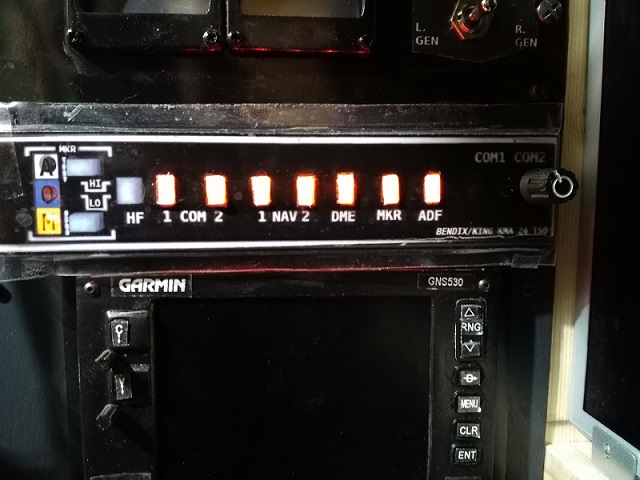
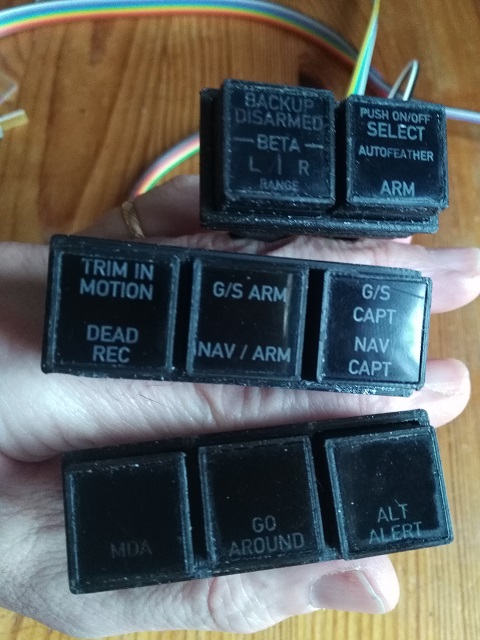
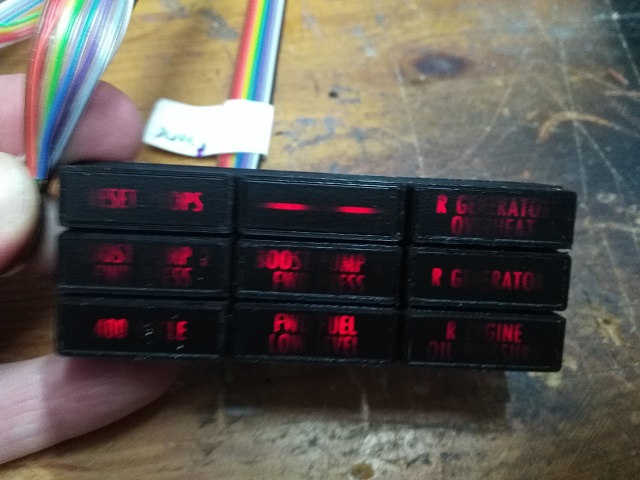
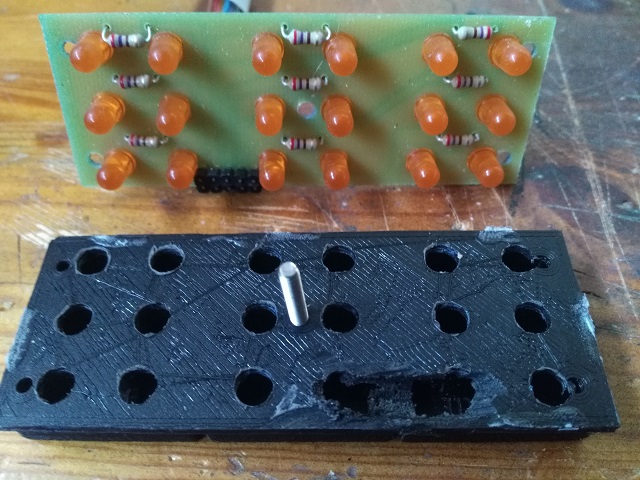
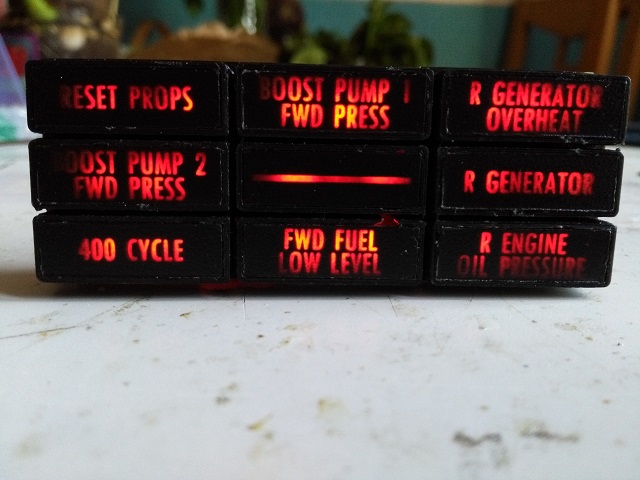
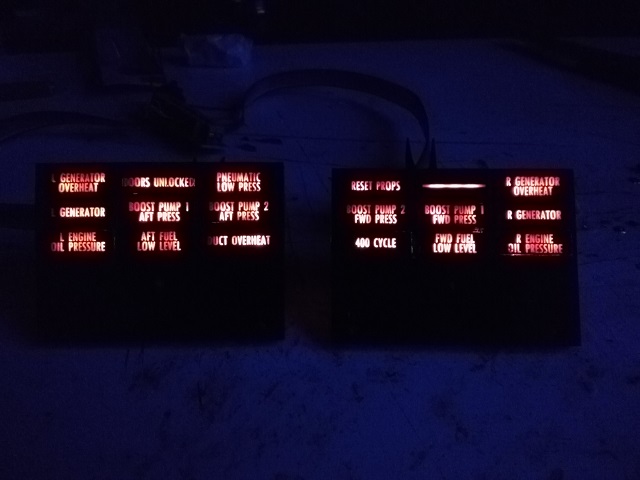
The alerters have been made by HomeCockpit on demand for my DHC6. They are based on existing Airbus korrys (some can be pushed).
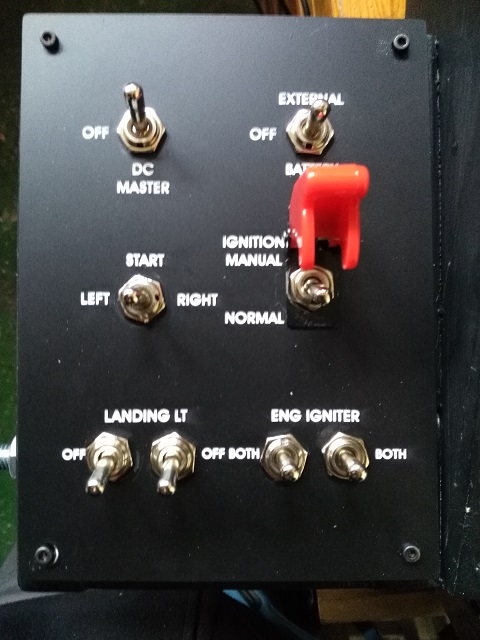
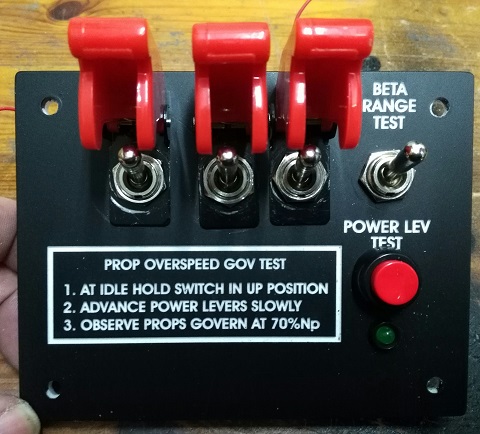
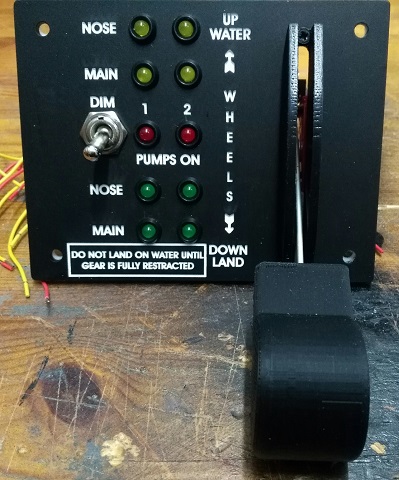
The AP has been designed by myself and built by HomeCocpkit too. Like the Fire Panel (picture below)
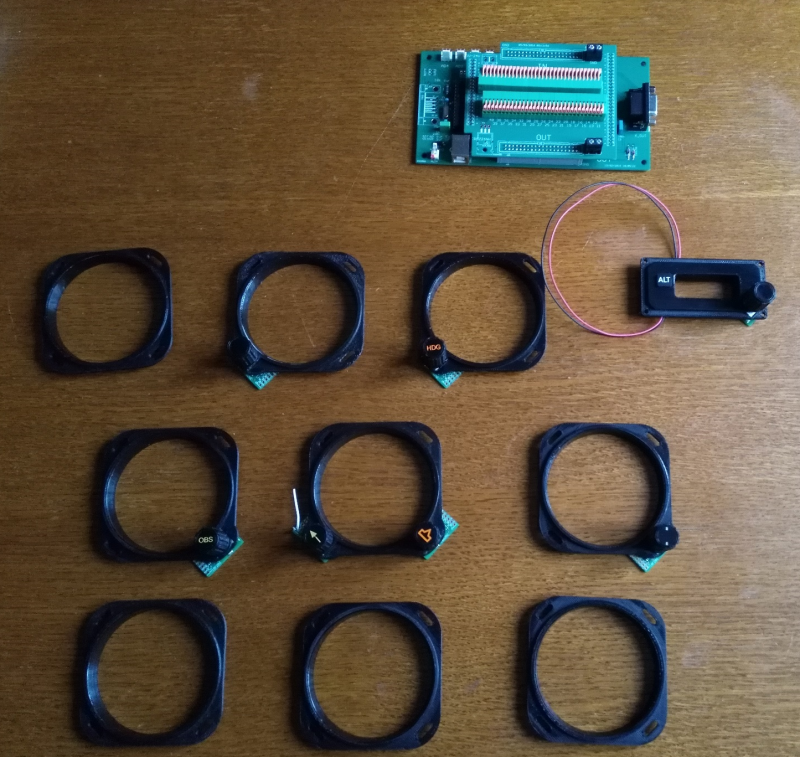
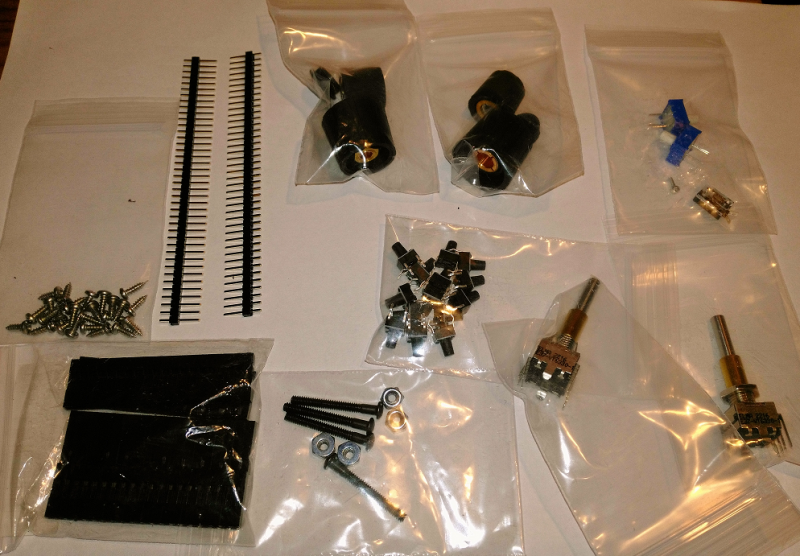
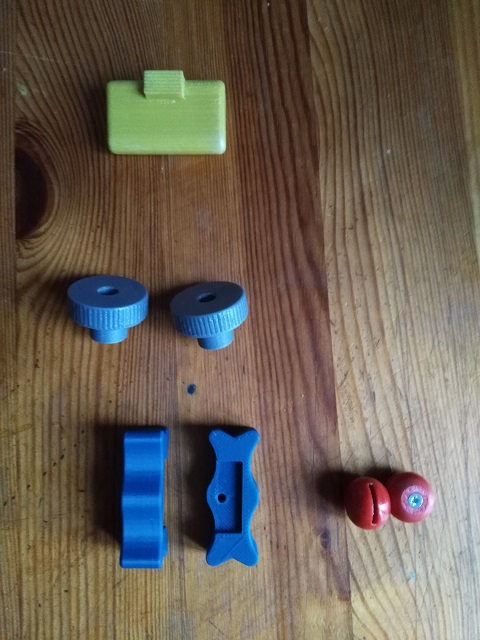
The bezels (to decorate the holes with a real instrument look) have been 3D printed by EFDE.
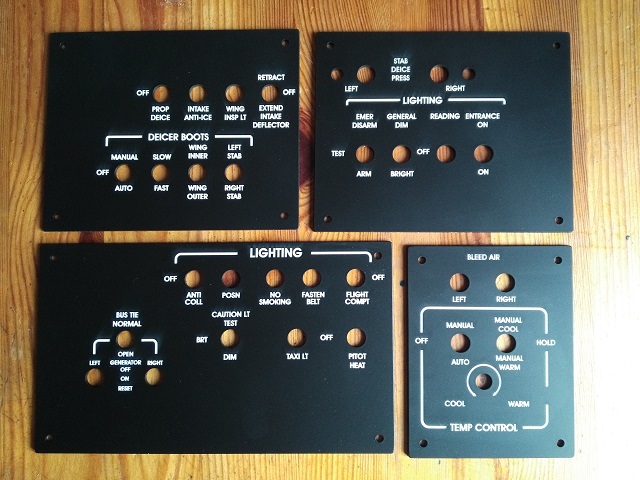
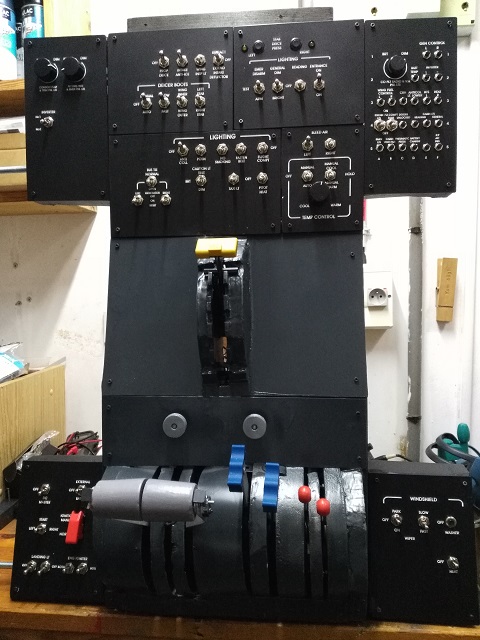
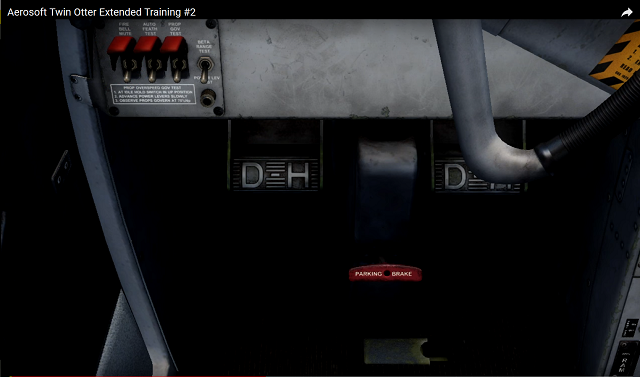
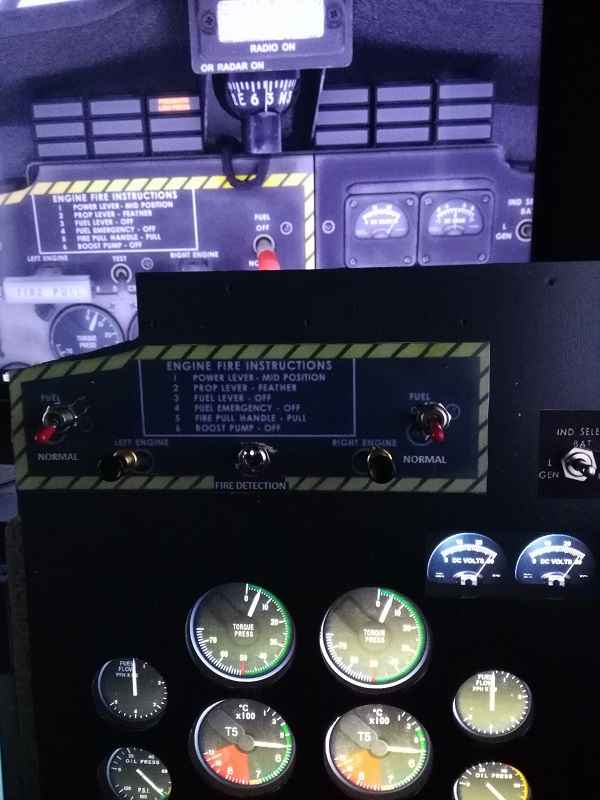
The engine panel face with the on demand fire panel and its fire handles light
The 3D printed small engines gauges bezels (EFDE) and the front lights (the little columns with a warm white LED) to illuminate from the front like on the real plane
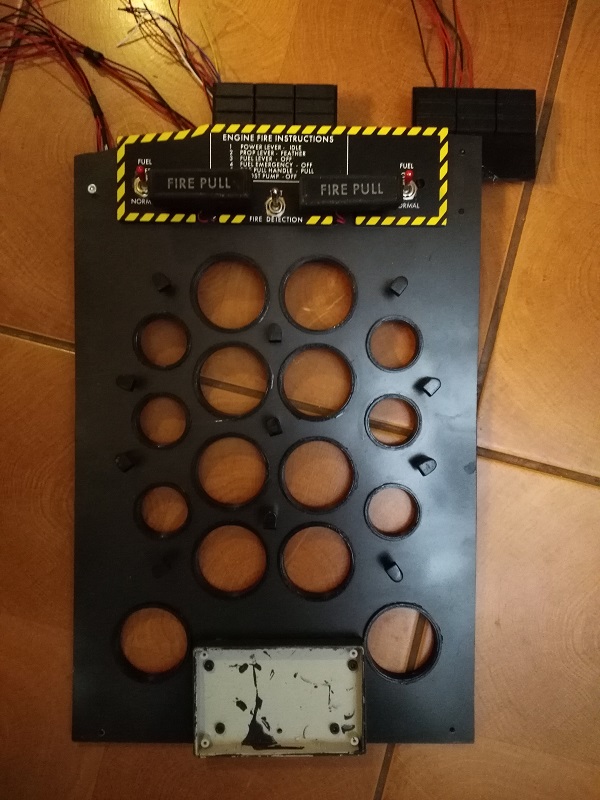
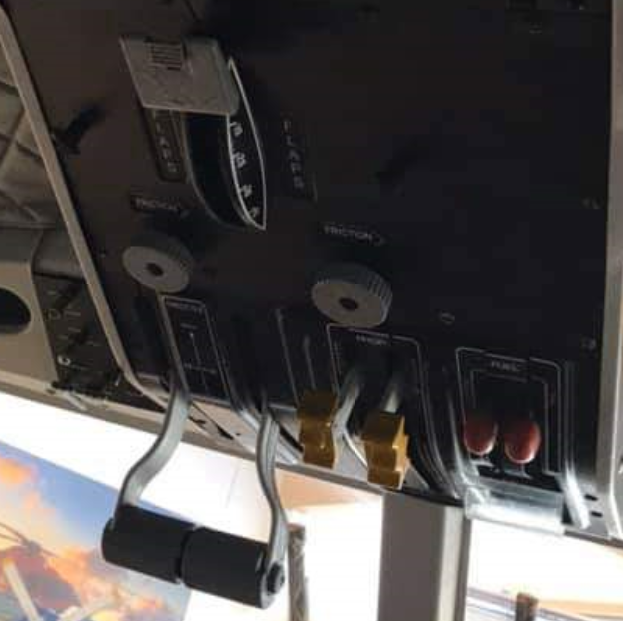
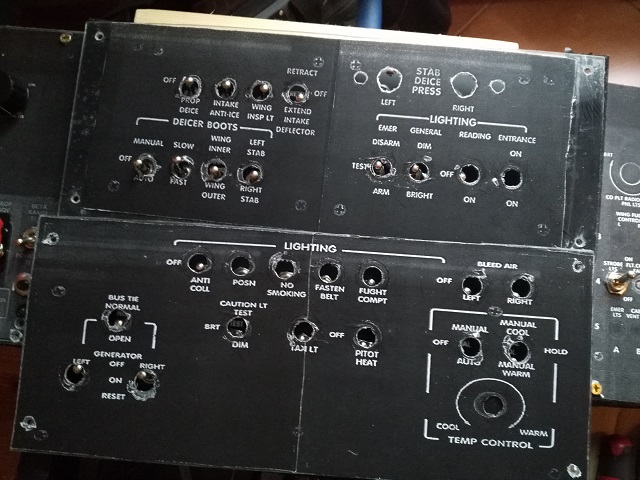
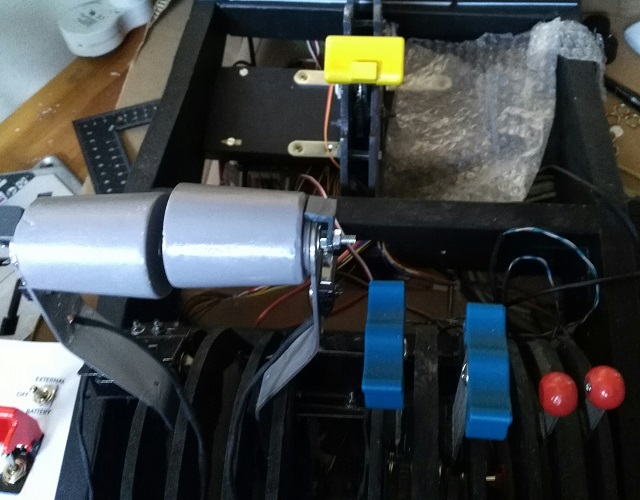
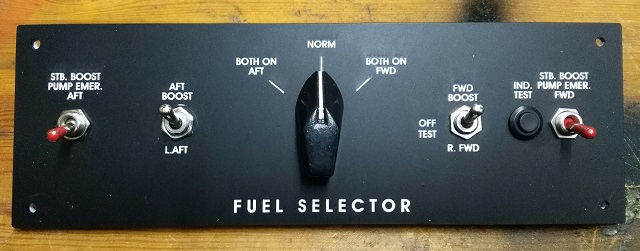
The box below was one fuel selector panel I placed here to hold the buttons at the normal place (like the real plane) ...
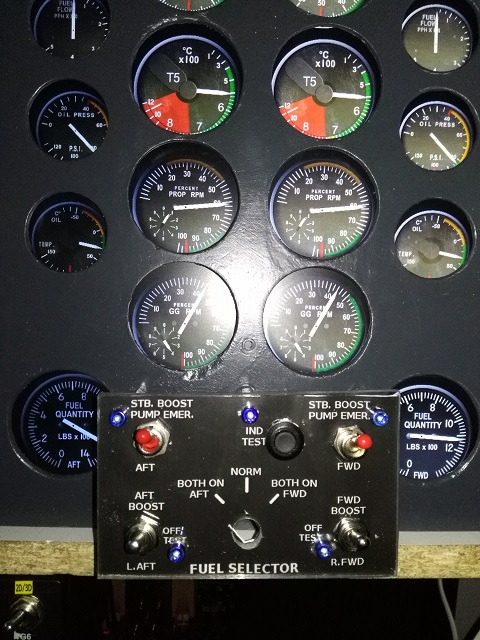
But I was not happy and I removed it to build a fuel selector placed BELOW the engines panels... this is the limitation of using a screen..
Thus the prototype became like below ; It was encouraging 

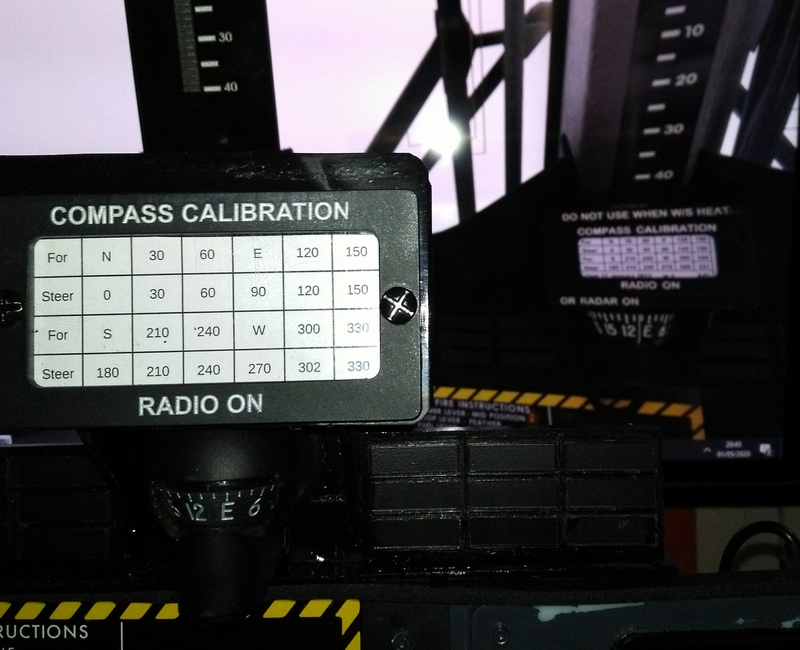
The DHC6 gauges are gauges built by a French friend who has finished is TwinOtter for the specific ones, the others are SimInnovation free gauges General Aviation ones.
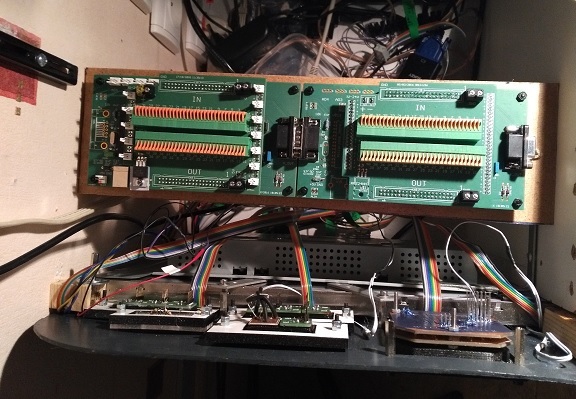
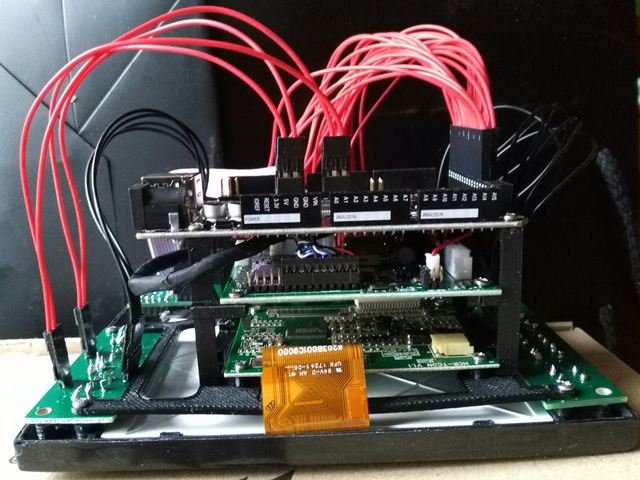
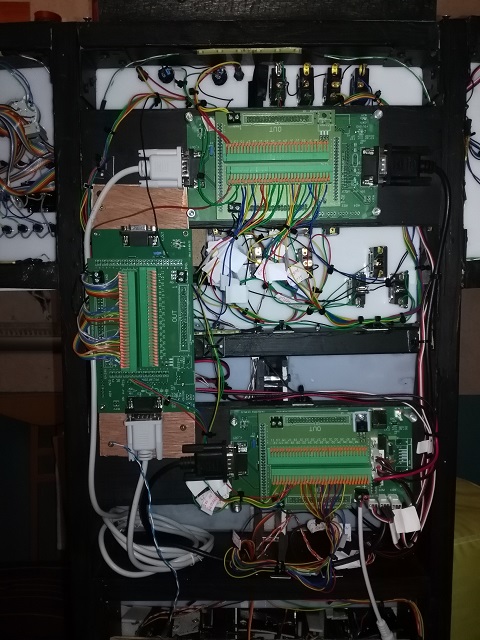
Here to unload the PC of extra display needs with graphic card outputs and CPU load, I choosed to use a new AirManager functionnality (it was new two years ago  ) : The Raspberry Pi
 ) : The Raspberry Pi
Here we have one Raspberry Pi connected to the left screen and another Raspberry Pi conencted to the engines screen. *
It is smooth and totaly frees the PC... AirManager loaded on the nano computers receives the simulator in live over the network and represent the data with the appropriate gauge.
The work is done once, we do have to think after. The Raspberry are doing their lives themselves !! A very good solution for a homecockpit solution I think !
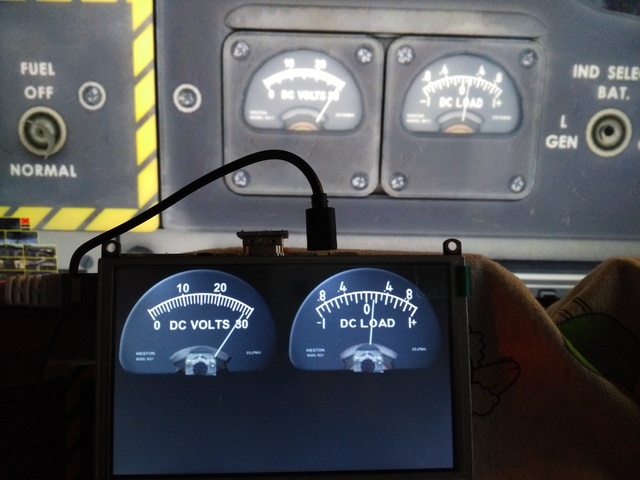
I use even a third raspberry to display the battery gauges. In the photo below, you see the 3D cockpit view and below the real display of my homecockpit.
The difference here is that the screen is a 10" one encapsulated on the Pi
You can see closely the 10" Pi screen with the battery gauges before the "decoration"